Sometimes (due to internet connection problems, firewalls, some kinds of antivirus software) the PhotobooksRus designer may not be able to connect to our server for upload.
In these instances, you can manually upload the project.
These instructions are mainly for PC users, but Mac users can follow along. The only difference for Mac users will be Step 5.
Step 1:
Follow the regular project ordering procedure, until you reach the following screen:
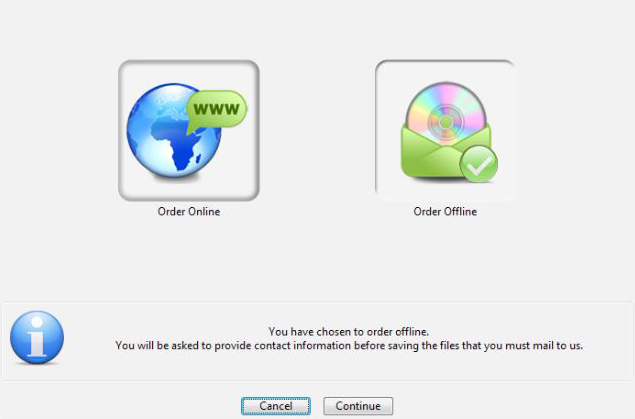
Select “Order Offline”, then press “Continue”.
Step 2:
You may be presented with one or more screens like this. If so, enter your full name, email address and delivery address. Please double-check all details are correct, to ensure your project is delivered to the right address.
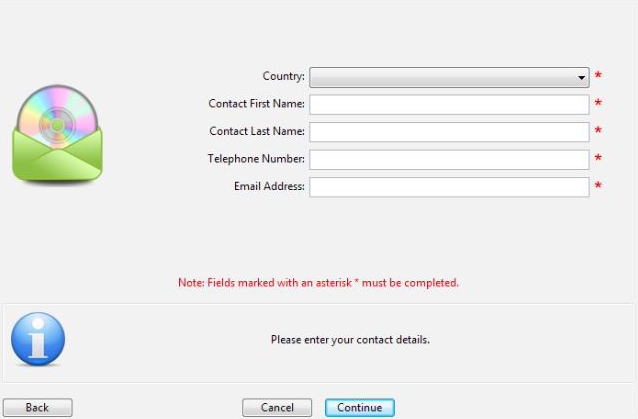
Press “Continue” to progress through the form, and again when done.
Step 3:
The software will then ask you where to save the completed project. We recommend saving the project to your desktop.
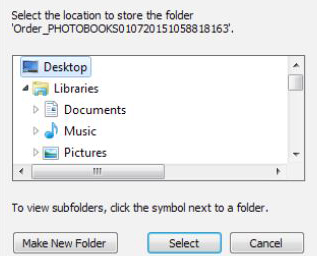
Press “Select” to begin saving the project. The software may take a few minutes to save the project, so please be patient.
Step 4:
When saving is completed, the software will present you with this screen:
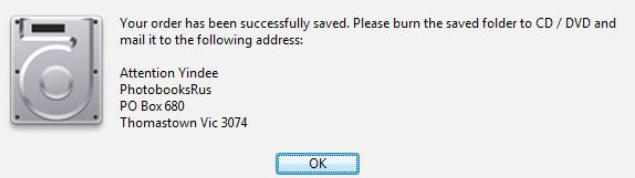
You can safely ignore this screen, as you won’t be mailing the saved project folder, you’ll be uploading the folder instead. Press “OK” and when possible, close the PhotobooksRus Software and find the folder on your desktop.
Step 5:
Once you’ve found the project folder on your desktop, right-click on it and select Send to > Compressed (zipped) folder
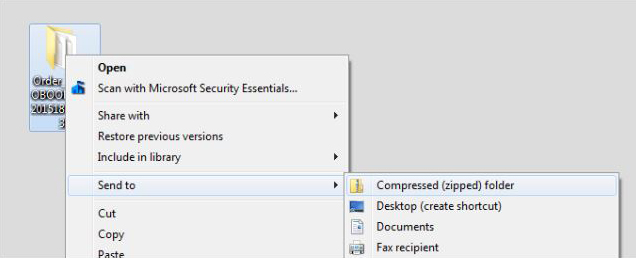
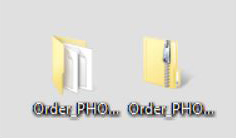
This will create a compressed ‘zipped’ folder, ready to be uploaded. On PC, you can tell it’s zipped because the folder icon has a ‘zipper’ on it.
On Mac, you can Ctrl-click the folder and select "Compress <name of folder>" from the contextual menu.
Once zipped, you can continue to Step 6.
Step 6:
Open a web browser (internet explorer, chrome, firefox, safari or opera) and enter the
following into the address bar: www.wetransfer.com
On the opening page, find and press the SKIP link.
Step 7:
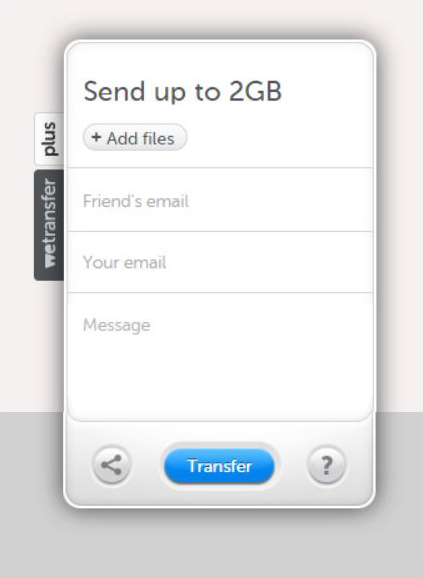
On the next screen, you’ll see a module like this: Click on the “+ Add Files” button, and select the ‘zipped’ folder you created in step 6.
Make sure it’s the zipped folder you’re selecting, because an unzipped folder won’t work.
After adding the zipped folder, enter forms@photobooksrus.com.au as the “Friend’s email” and enter your own email into the “Your email” field.
Finally, enter any voucher codes and/or additional notes / instructions into the “Message” field.
When you’re happy that all the entered information is correct, press “Transfer”.
Step 8:
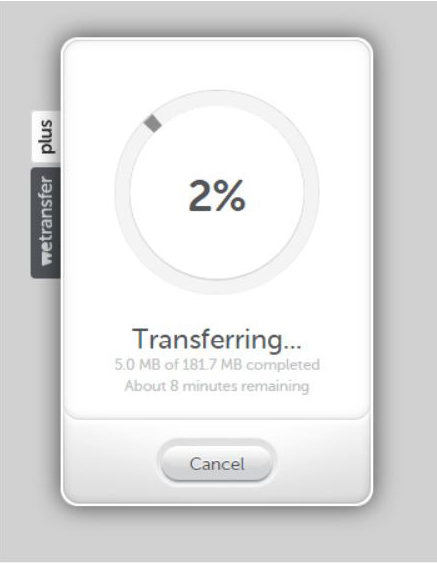
The WeTransfer system will begin uploading. This may take a few minutes depending on your internet connection and the size of the project.
Once the upload is complete, you’ll receive an email informing you.
You’ll also receive an email letting you know that we’ve downloaded the project at our production facility,ready to print and dispatch.
If you have any further questions after uploading, please get in touch.
For your own records, you may want to put a backup copy of the zipped project folder on a CD, DVD or external storage device, so that you can re-order your project at a later date.